What is the roll forming process?
The roll forming process is a metal-forming operation that imparts the desired shape to a material strip in a progressive manner.
The material strip could be either ferrous materials such as mild steel, or nonferrous materials such as aluminum, copper, and brass. Some nonmetallic materials like plastic can also be roll formed. These materials are created, by other processes, in sheets, coils, or strips, and supplied to the site of the roll forming operation.
The material strip then undergoes a series of folding or bending processes, or both, to get a desired, engineered shape.
The final shapes contribute to products such as door panels, metal roofing sheets, automotive frames, road barriers, electrical cable supporters, storage racks, and steel drawers. For example, a company like Tekfab serves many industries such as electrical, automotive, infrastructure, and more.
What are the 7 basic steps in the roll forming process?
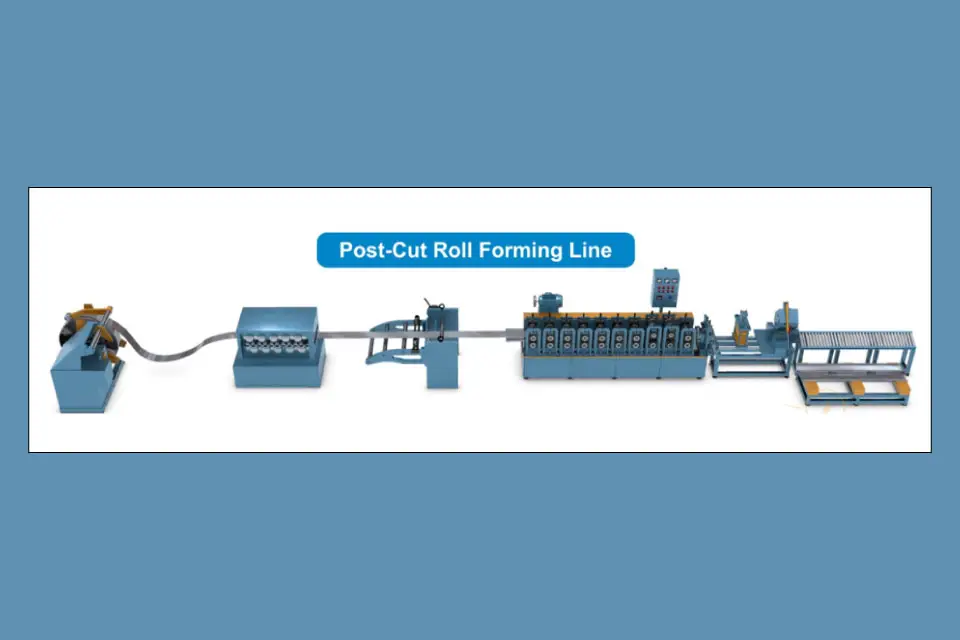
The material strip can be fed into the roll forming line using either a pre-cut roll forming line or a post-cut roll forming line. A post-cut roll forming line setup is the most common and described here.
1. The roll forming process begins with the loading of the coil onto the decoiler.
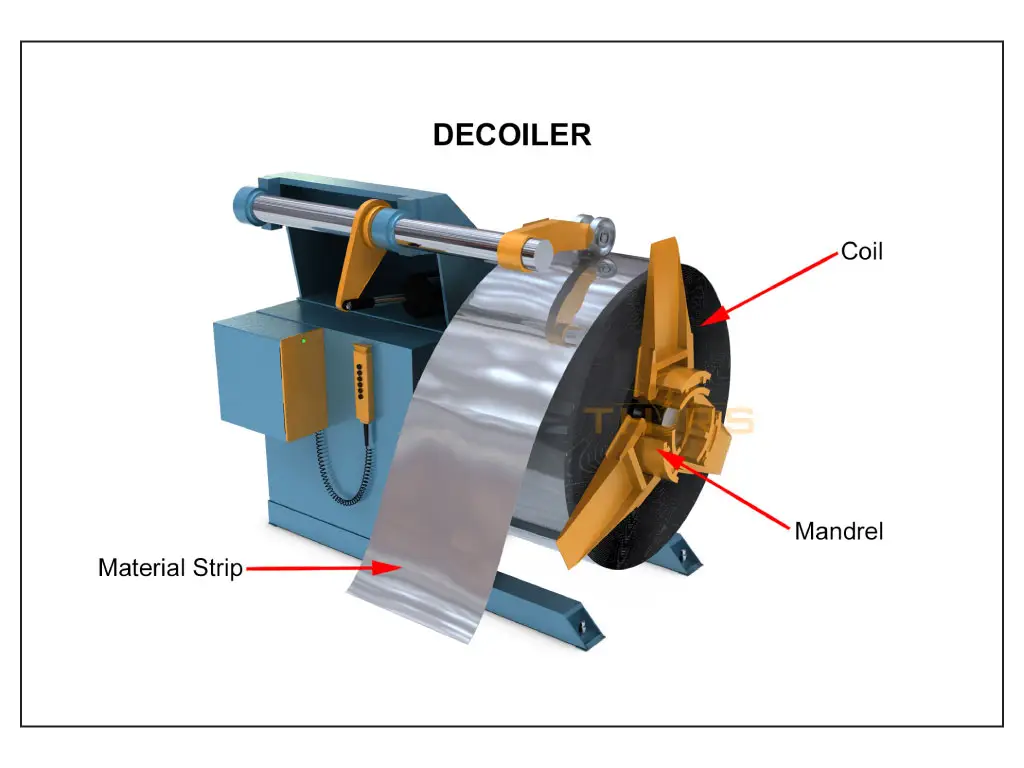
2. The coil rotates to unwind the material strip into the strip straightener.
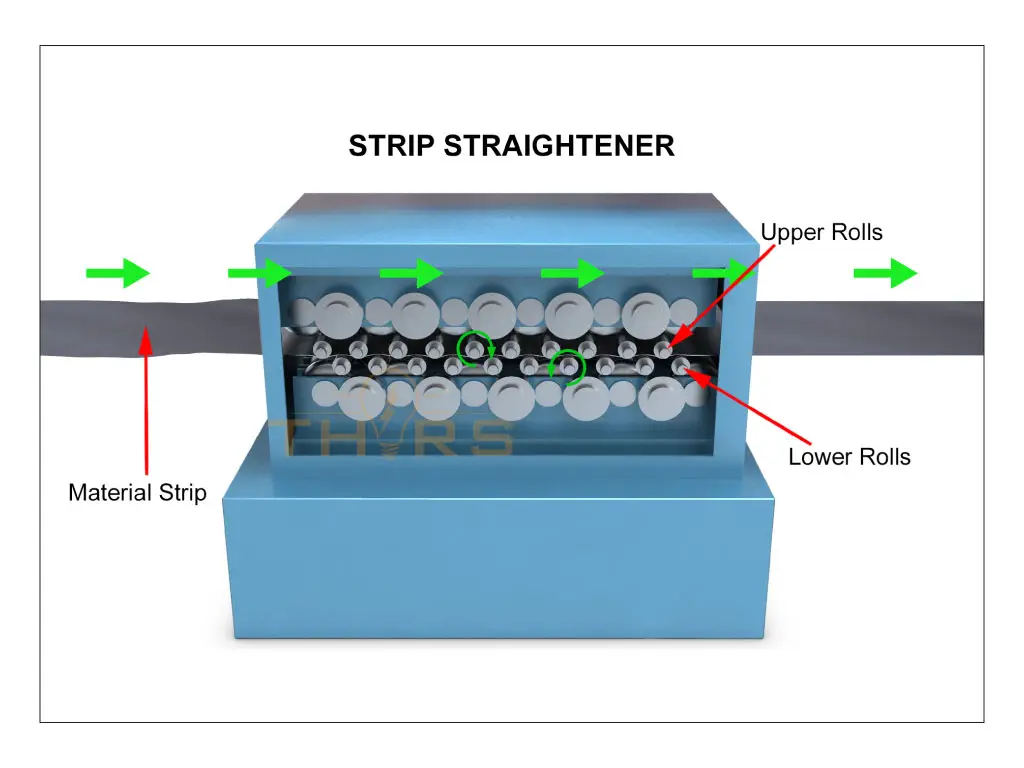
3. The strip straightener levels the material strip to remove pre-existing defects before the strip enters the press feed unit.
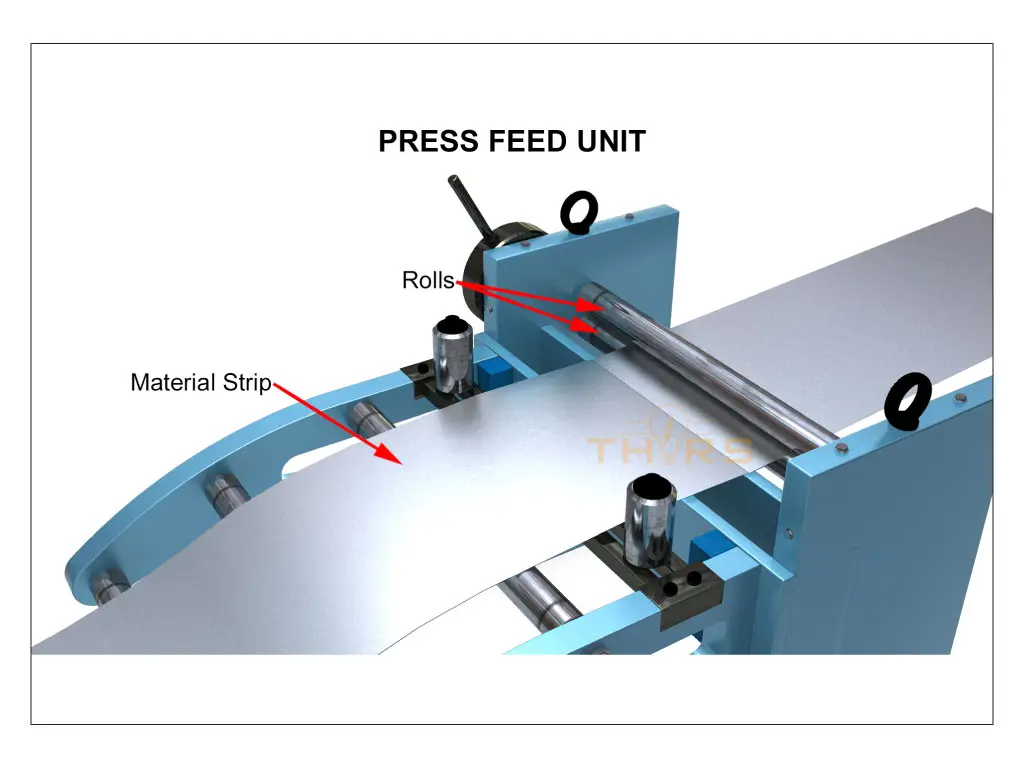
4. The press feed unit feeds and guides the strip to ensure a smooth entry into the pre-punch press. In the absence of the pre-punch press, the press feed unit directly feeds the material strip into the roll forming machine.
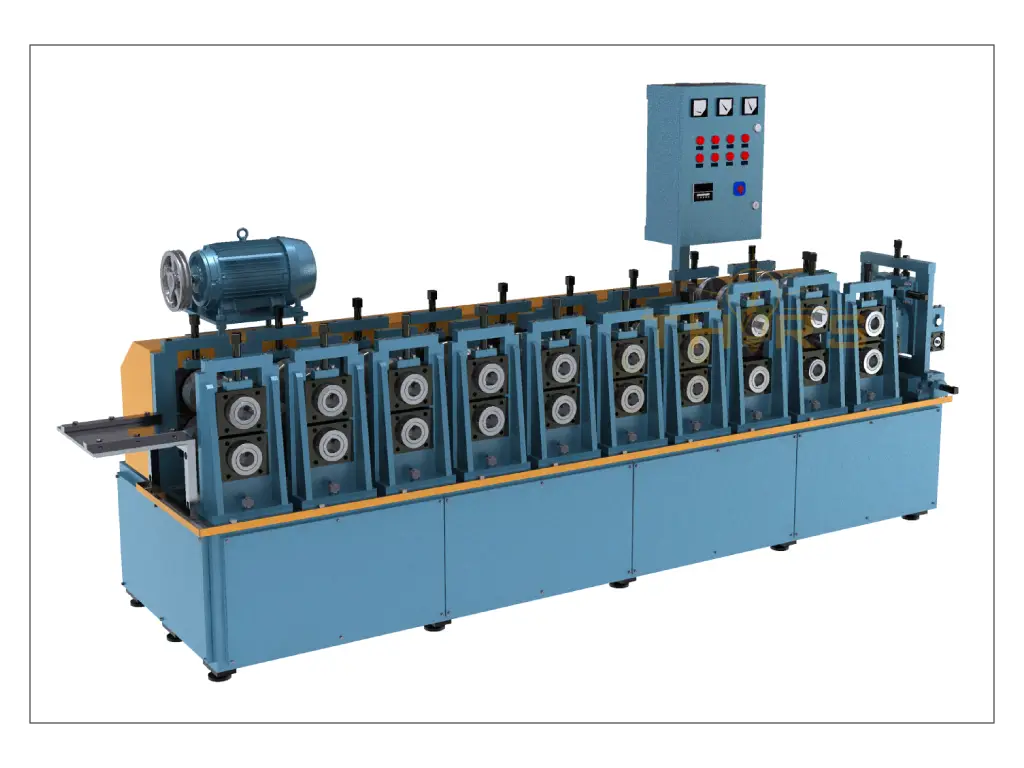
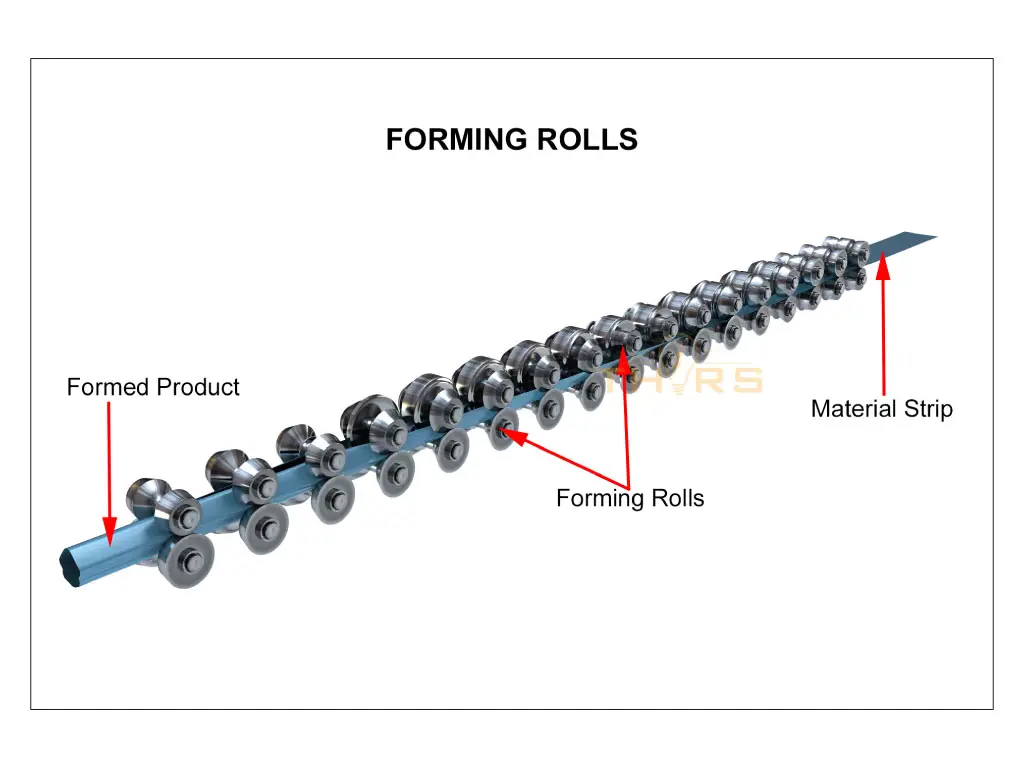
5. The roll forming machine uses a series of forming rolls that shape the material strip. Each pair of forming rolls gradually imparts the shape to the material strip.
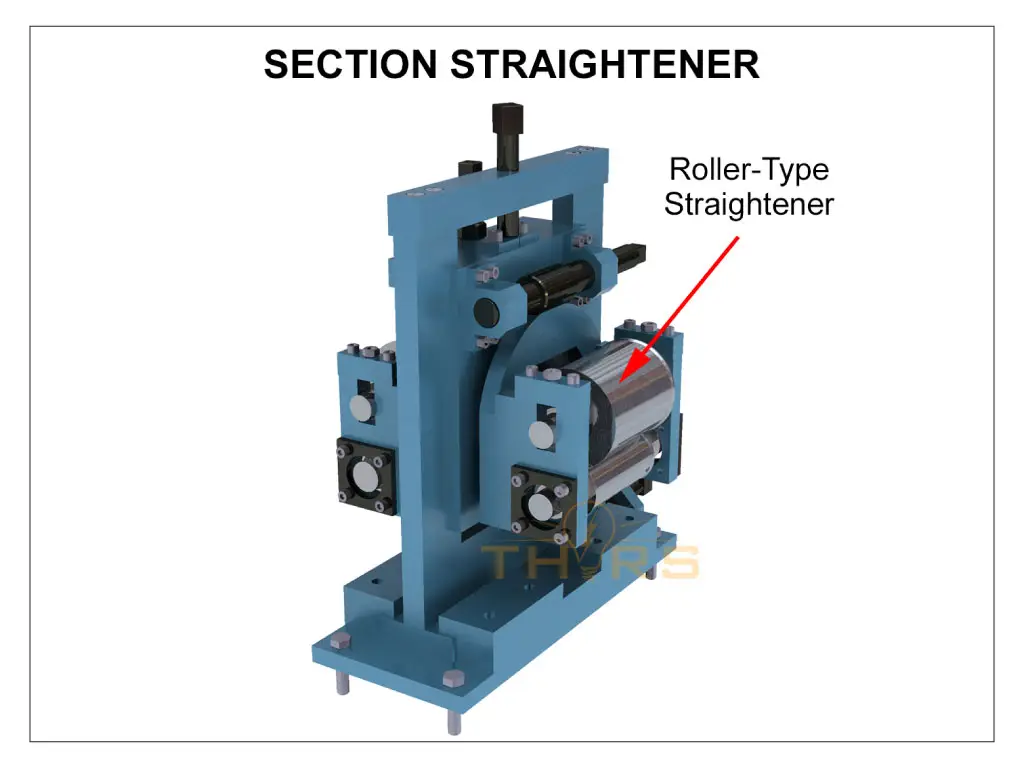
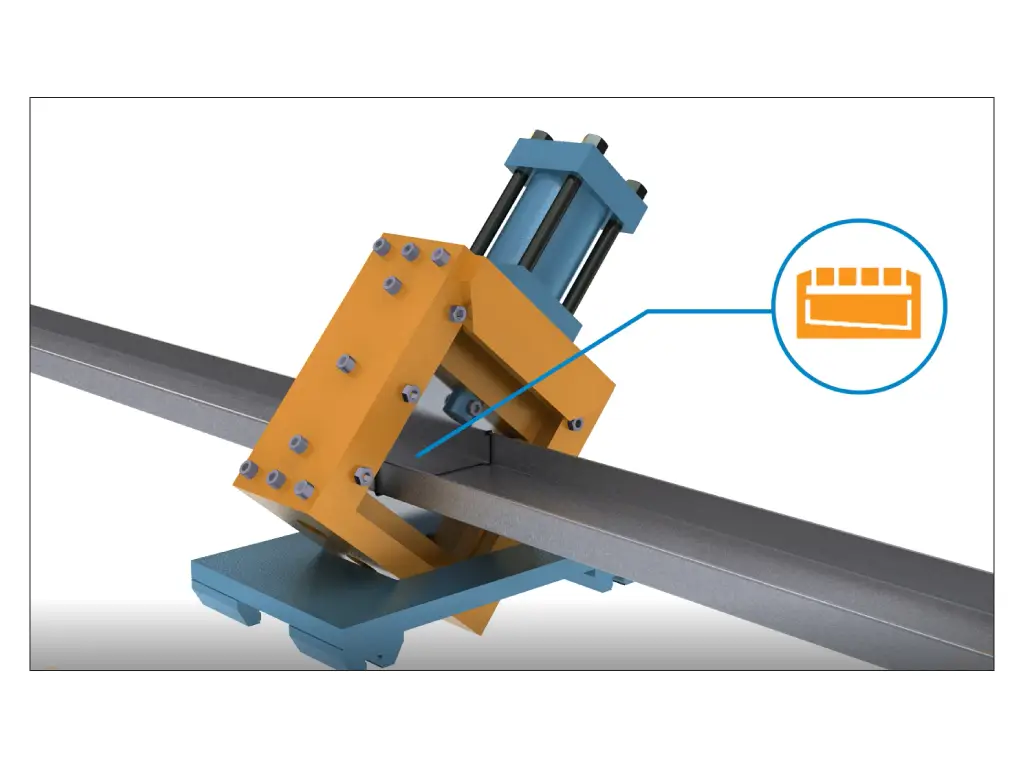
6. Once the shape is fully formed, the product enters the profile straightener to remove any bends produced during the forming operation.
7. The formed product then enters the cut-off press, is cut to the desired length, and is stacked on a run-out table along with the other formed products from the roll forming line. This is the last stage of the roll forming process.
Several other secondary processes, such as welding, mitering, piercing, and punching operations, can be added to the roll forming line.
What are the advantages and limitations of the roll forming process?
| Advantages | Limitations |
|---|---|
| Producing hollow and semi-hollow shapes | Requires highly skilled engineers and technicians to design the process and set up the roll forming line |
| Reducing handling costs and eliminating post-process finishing by integrating secondary operations into the roll forming line, such as piercing, punching, and bending | Requires periodic checks of the tools and equipment and a high level of maintenance |
| Ability to roll form different materials into a single product | Can be expensive for low volume production |
| Obtaining superior surface finish without die marks | |
| Producing economical and efficiently shaped products | |
| Ability to redesign and reuse roll forming tools, such as forming rolls and side rolls, for different products with minimum variation in the design | |
| Capable of producing products in higher volumes efficiently when compared to other metal forming processes |
Want to learn more about roll forming? Check out the new THORS course, Roll Forming Basics.