Wire processing for automotive wiring harnesses is critical to ensuring that modern vehicles operate safely and efficiently. This process involves preparing, organizing, and connecting wires so that electrical power and signals can flow reliably between sensors, control units, actuators, and other vehicle components.
Effective wire processing not only enhances the durability and performance of the wiring harness but also minimizes the risk of electrical failures caused by heat, vibration, or mechanical stress. In this blog, we will explore seven essential steps of wiring harness wire processing and explain why each one is vital for creating a high quality automotive wiring harness.
Step 1:
Cutting to
Ensure Proper
Length and Fit
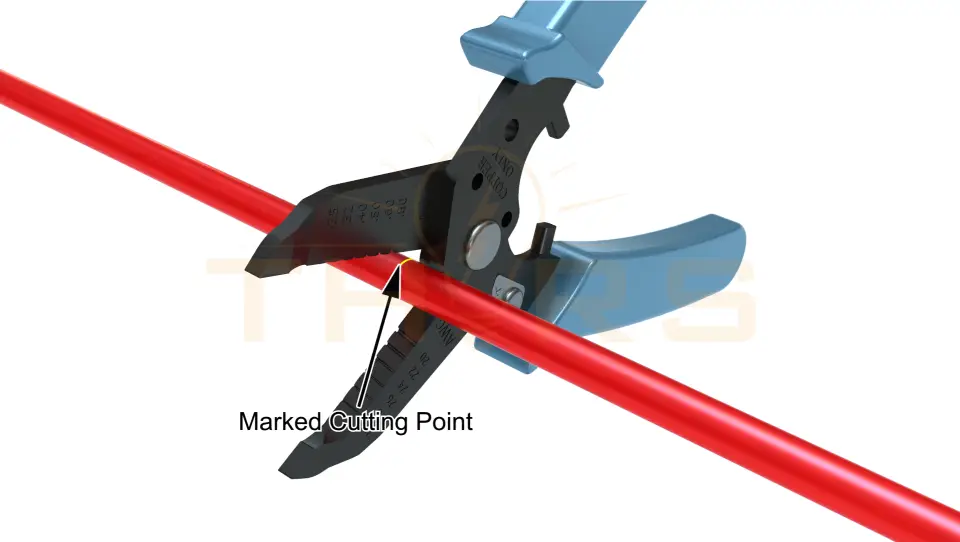
The first step in wiring harness wire processing is cutting wires to the specified lengths. Accurate cutting ensures that wires fit their intended route without slack or tension. This step prevents routing issues and reduces the risk of mechanical stress or damage during assembly, making later steps such as bundling and connector installation easier.
Step 2:
Stripping to Prepare
Conductors for Reliable Connections
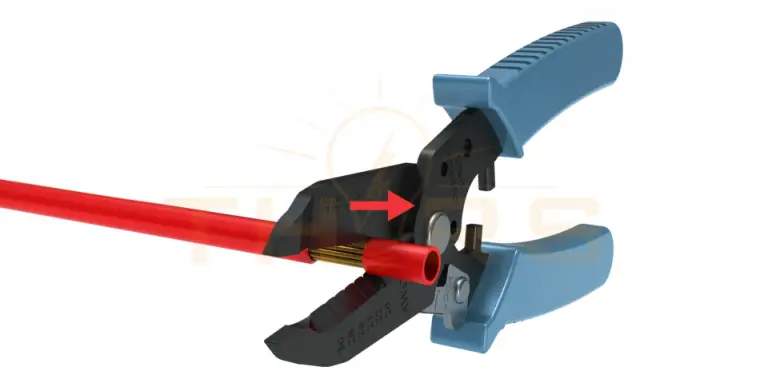
Stripping a wire with a wire stripper and cutter.
Stripping removes insulation from the wire ends to expose the conductive core. Proper stripping is essential because nicked or damaged strands can lead to poor electrical contact, higher resistance, or eventual failure. Cleanly stripped wires are more reliably prepared for the next step, wire termination, and are less likely to cause defects in the final wiring harness.
Step 3:
Wire Termination
to Create Strong Electrical
and Mechanical Bonds
Crimping a terminal onto a wire using a crimping tool.
Wire termination connects stripped wire ends to terminals or pins. Crimping is the most common method, forming both a mechanical and electrical bond. Soldering or welding is sometimes used for additional strength. Correct wire termination ensures consistent conductivity and allows the wiring harness to withstand vibration and movement inside the vehicle, reducing the likelihood of electrical failures.
Step 4:
Labeling to
Ensure Clear Identification
for Maintenance
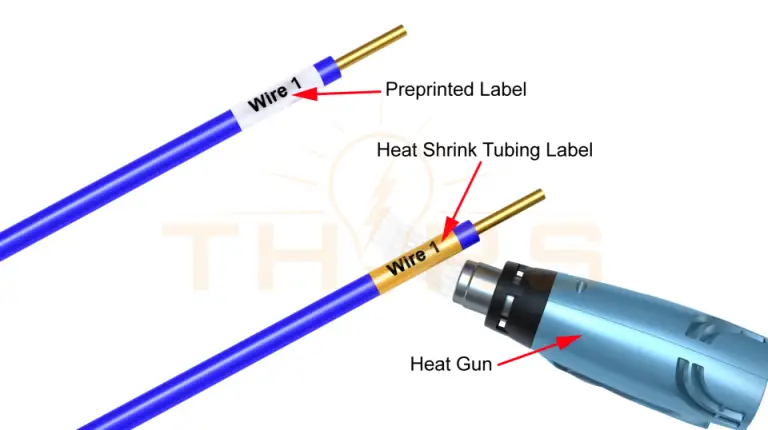
Adding labels to wires.
Labeling identifies individual wires, circuits, and connectors. Using adhesive or heat shrink labels helps maintain clear identification throughout assembly and servicing. Proper labeling reduces errors, speeds up installation, and makes troubleshooting or maintenance far easier, especially in complex wiring harnesses with dozens or hundreds of connections.
Step 5:
Splicing to
Create Continuous
Electrical Circuits
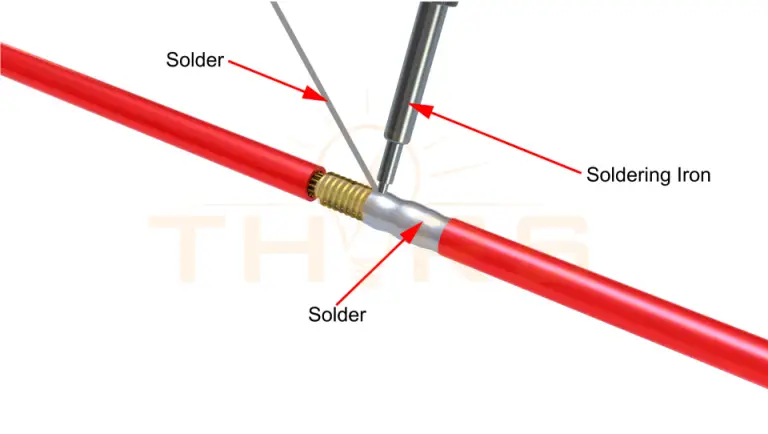
Splicing two wires.
Splicing is a step that is performed, when necessary, to join two or more wires to form a continuous path, allowing branching circuits or additional connections between wires within the wiring harness. Techniques such as crimp splices, solder joints, or welding maintain the integrity of the electrical path. After splicing, protective insulation prevents moisture ingress and short circuits. A proper splice ensures both electrical reliability and mechanical durability.
Step 6:
Connector Installation
to Secure Reliable
Component Interfaces
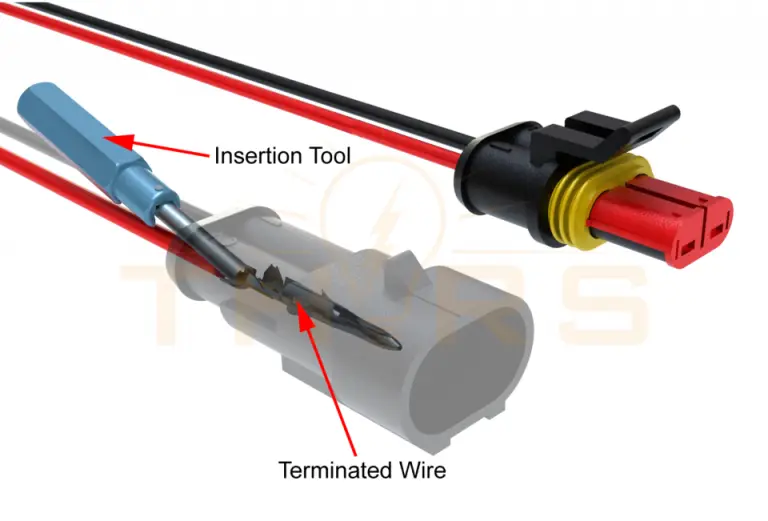
Inserting a terminated wire into a connector housing.
Connectors provide the interface between the wiring harness and vehicle components. Wires must be placed in the correct housing positions, and terminals must lock securely. Seals and keying features maintain contact stability and protect against environmental factors. Well-installed connectors reduce the chance of accidental disconnection and support long term reliability.
Step 7:
Bundling to Organize
and Protect Wiring Harnesses
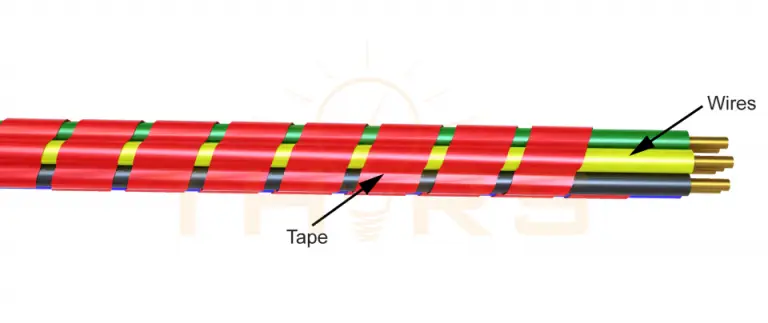
Bundling wires using tape.
Bundling groups multiple wires into organized wiring harnesses using techniques such as braiding, taping, zip tying, heat shrinking, or sleeving. Proper bundling prevents abrasion and damage, simplifies installation, improves airflow around hot components, and keeps the wiring harness neat for assembly and servicing. Bundled wiring harnesses also reduce stress on wires during vehicle operation.
Wire processing is essential to produce wiring harnesses that are reliable, safe, and durable. Each step, from cutting to bundling, has a clear purpose and contributes to the overall performance of the vehicle’s electrical system. Careful attention to detail ensures that the wiring harness can withstand vibration, heat, and other challenges throughout its lifetime. Wire processing for wiring harnesses is not just about connecting wires; it is about building the foundation for a dependable and high performing electrical system.
Have you ever wondered how your television understands and responds to the commands that are given to the remote control? Breaking apart a television remote…
In an increasingly interconnected world driven by technological advancements, a looming crisis has captured the attention of industries, governments, and individuals alike: the semiconductor chip…
Generally, a standard PCB contains conductive and insulator layers made of core, copper foil, and prepreg materials laminated and compressed together to form an electronic…